Quick Start
Welcome to Unicorn Solution, a camera visualization and monitoring application designed for fisheye-based vehicle systems. After launching the application, you’ll be greeted with a clean, intuitive interface that provides quick access to live monitoring, playback, and configuration features.
After Launching the Unicorn Solution Application, you’ll be greeted with a clean and intuitive interface.

To get started, click the Switch button to switch to Load Media Or Live Camera. You can either Open Camera — to use a connected live camera device — or Load Media — to import recorded video files from local storage. .
Load Media & Open Camera
In the Unicorn Solution system, users can choose between opening stored video recordings (offline media) or connecting directly to a camera (live camera) to display a real-time view from the vehicle camera system.
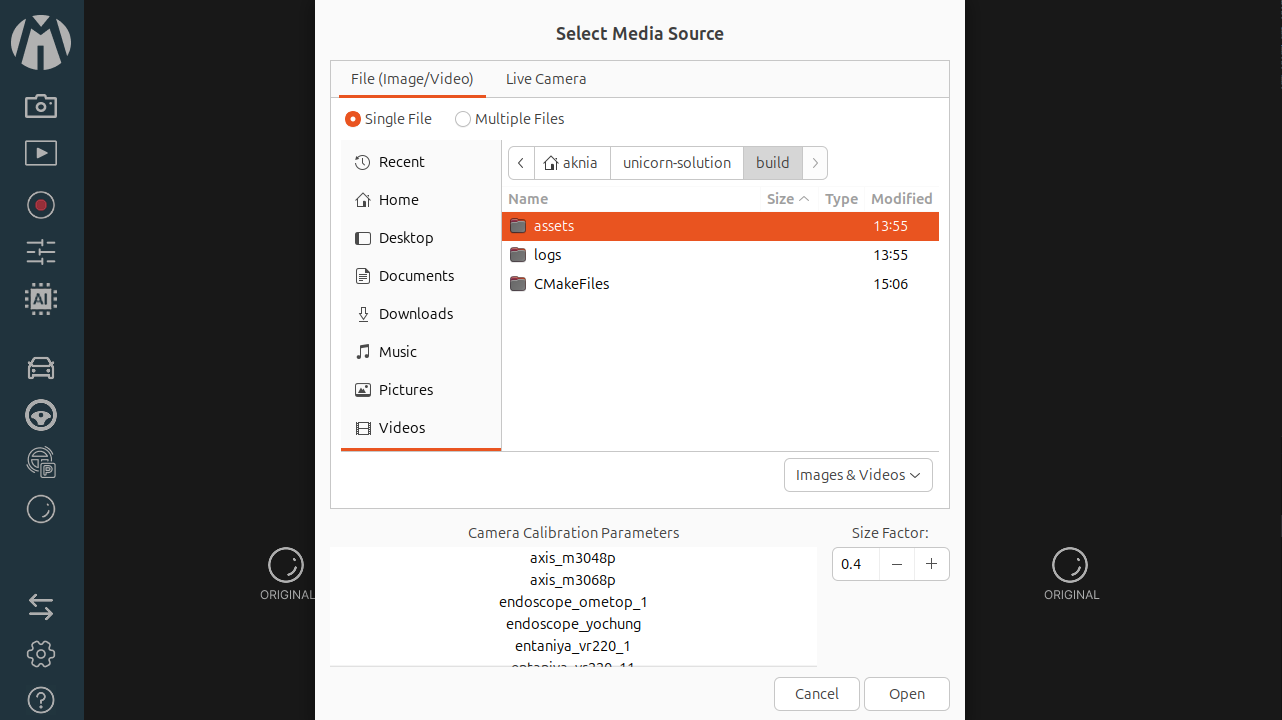
- Load Media – Select the desired media file and corresponding camera parameters from the “Load Media” menu. In the “Select Media and Camera Parameter” window, choose the correct calibration file, then click “Open” to display the footage in the main application window.
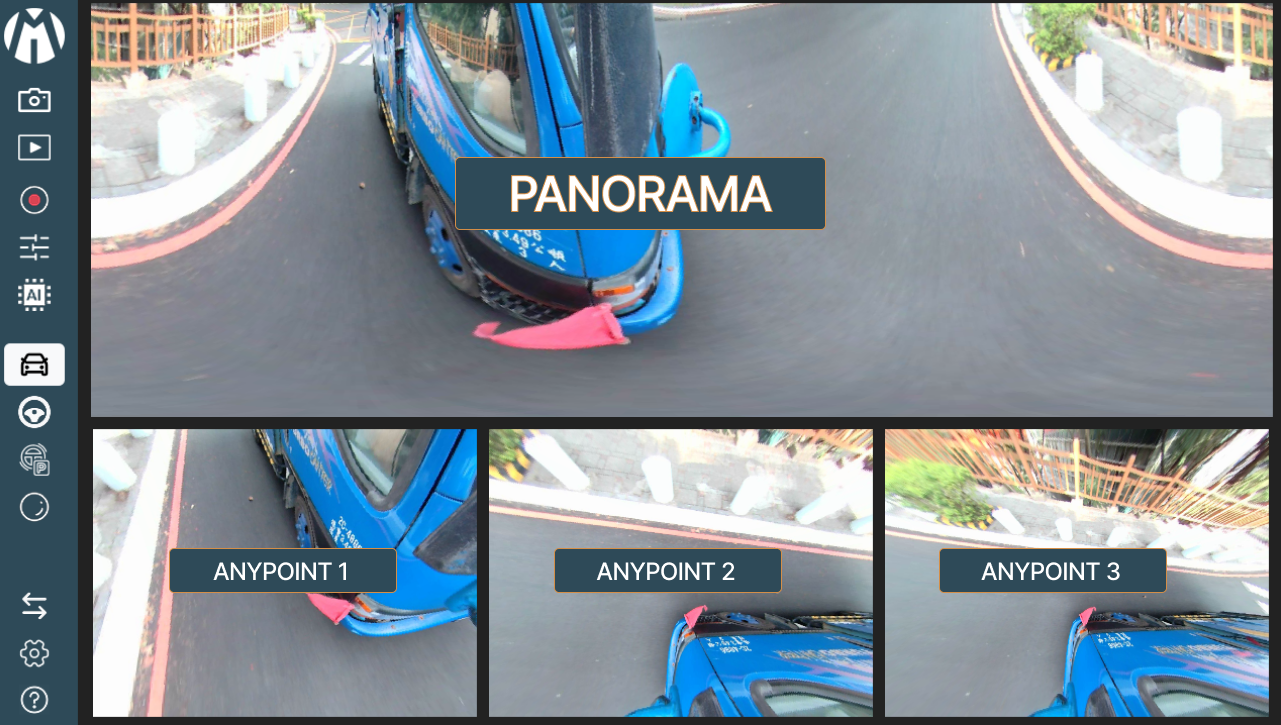
- Open Camera – To view a live feed, open the “Select Camera Parameters and Device” window, choose the appropriate camera configuration (e.g., syue_7730v1_1, socionext_l, socionext_r), ensure the device is detected, and click “Open” to start live streaming. Once the media or camera is open, the main interface display will show various visual modes such as Original Mode and Panorama Mode, allowing users to analyze, monitor, and evaluate images directly according to system requirements.
- Single or Multiple - Users can choose count of media sources. Singles or Multiple media choosen after selected media.
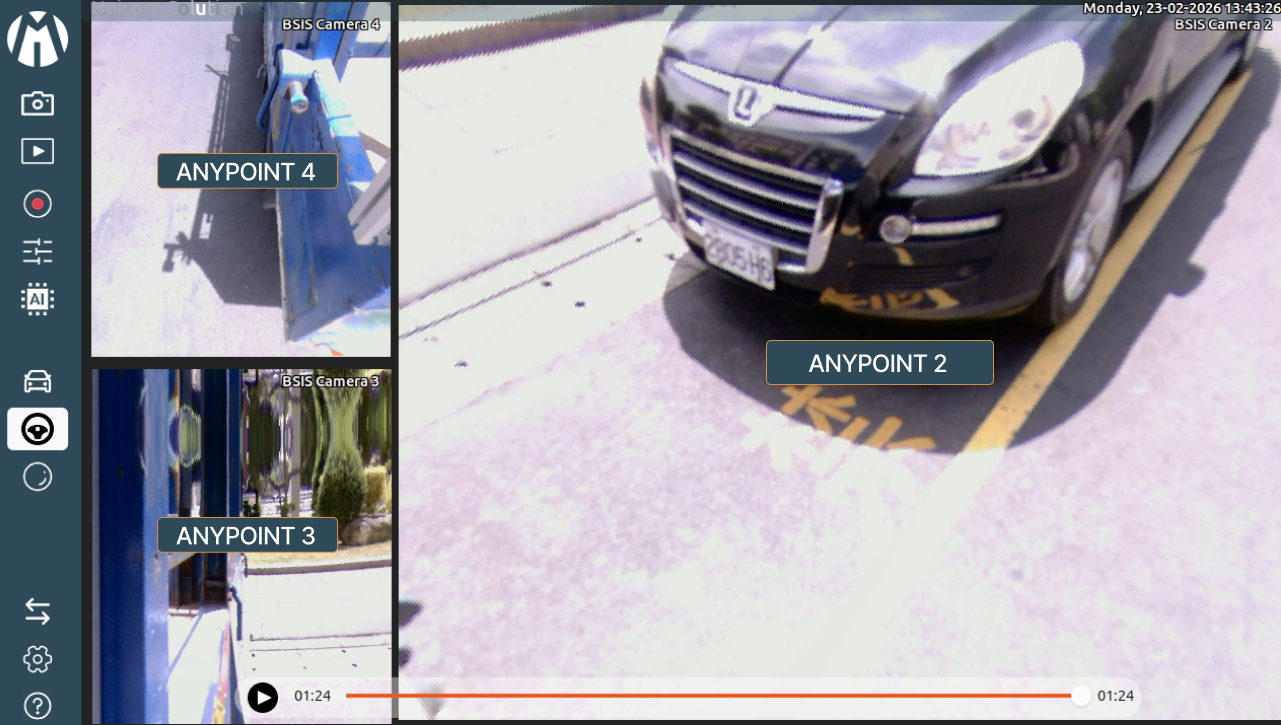
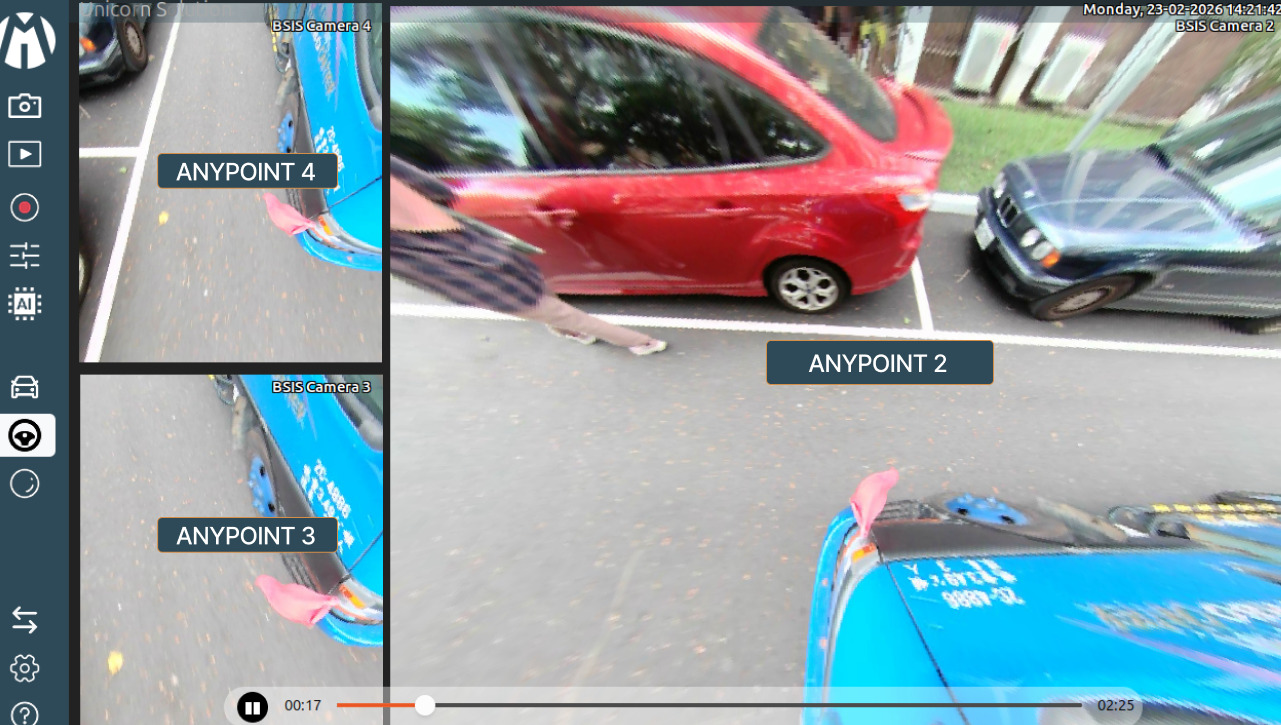
Live View Mode
Live View Mode provides real-time visualization from the vehicle’s camera system. It allows users to monitor different viewing modes—such as MOIS, BSIS, Original, and Panorama—in a single interface. Through this mode, users can observe live surroundings, analyze blind spot areas, and verify system performance directly, supporting both operational safety and situational awareness.
-
MOIS View
This mode is designed to support the Blind Spot Information System (BSIS), which detects the presence of objects or road users in the vehicle's blind spots. The camera display in this mode focuses on specific areas—such as the left, right, front, or rear—depending on the direction of the vehicle and traffic conditions. With the help of detection algorithms and additional sensors, the system can provide visual warnings to the driver when there is a potential hazard around the vehicle. BSIS Mode is very important in improving the operational safety of large vehicles, especially in urban areas, as it helps prevent accidents caused by objects that are not directly visible to the driver through the rearview mirror.
-
BSIS Drive View
This mode is active when the vehicle is moving forward and monitors the blind spots on the left and right sides of the vehicle. This display helps drivers detect pedestrians, cyclists, or objects around the front and sides of the vehicle, especially when starting to move from a standstill. This system enhances awareness in congested areas such as terminals or city streets, with automatic activation when the transmission is in the “Drive (D)” position.
-
BSIS Reverse View
This mode is automatically activated when the vehicle is reversing and displays the rear and rear side of the vehicle to ensure there are no pedestrians, riders, or objects in the reverse path. The camera provides a wide view with minimal distortion to assist with parking maneuvers and safely exiting narrow areas. This mode supports the driver in preventing collisions in areas that are difficult to see from the rearview mirror when the transmission is in “Reverse (R)”.
-
BSIS Left View
This mode focuses on monitoring the blind spot area on the left side of the vehicle to detect cyclists, pedestrians, or small vehicles that may not be directly visible from the cabin. The camera display shows the entire left side of the vehicle from front to rear, which is very useful when turning or changing lanes to the left. This mode can be activated automatically when the left turn signal is turned on or when the sensor detects an object on the left side of the vehicle.
-
BSIS Right View
This mode monitors the blind spot on the right side of the vehicle, helping the driver see pedestrians or objects that may be outside the rearview mirror's range of vision. The camera displays the area along the right side of the vehicle to support maneuvers such as turning right, changing lanes, or exiting a parking space. This mode is usually activated automatically when the right turn signal is activated or the sensor detects movement on the right side.
-
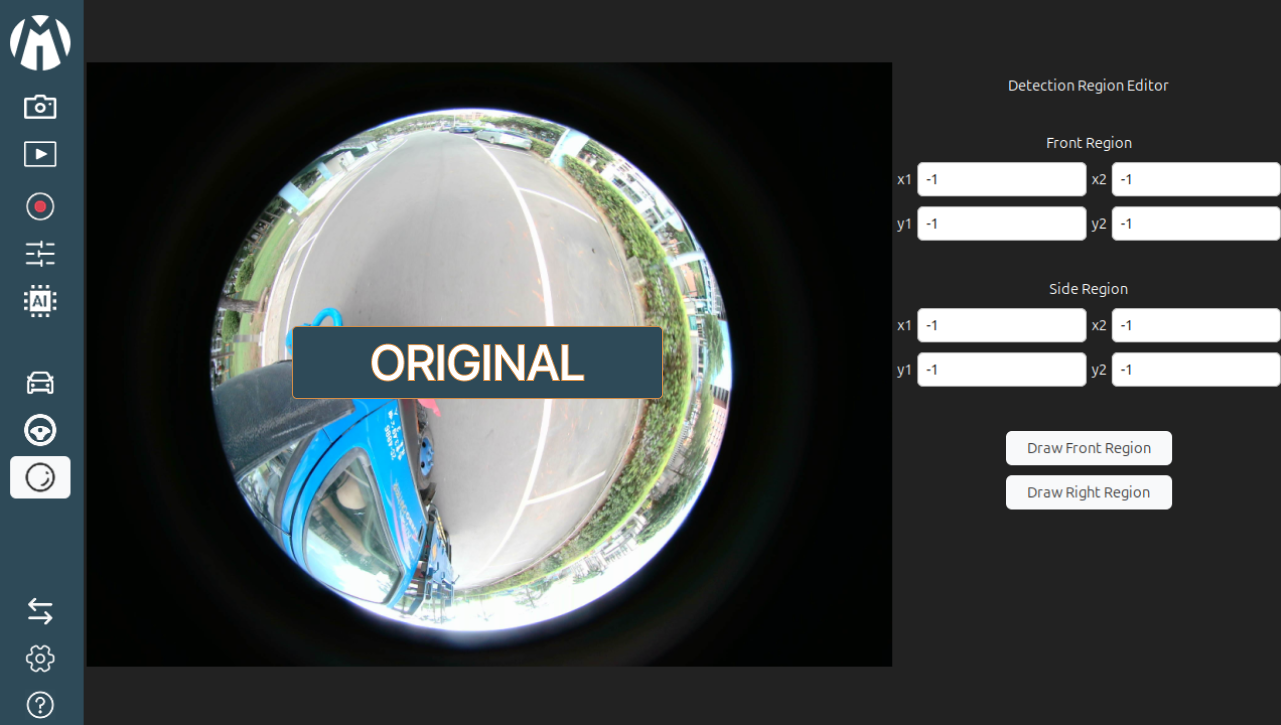
Original View
This mode displays fisheye camera footage in its original form without image processing or cropping. All areas captured by the fisheye lens can be seen in their entirety in a single view, providing extremely wide surveillance coverage. Although the display appears curved due to optical distortion from the lens, this mode is very useful for monitoring the entire area around the vehicle in real-time without losing visual information. Original Mode is typically used for system calibration, full area monitoring, or camera position verification, as it shows the raw field of view from the camera sensor.
Playback View Mode
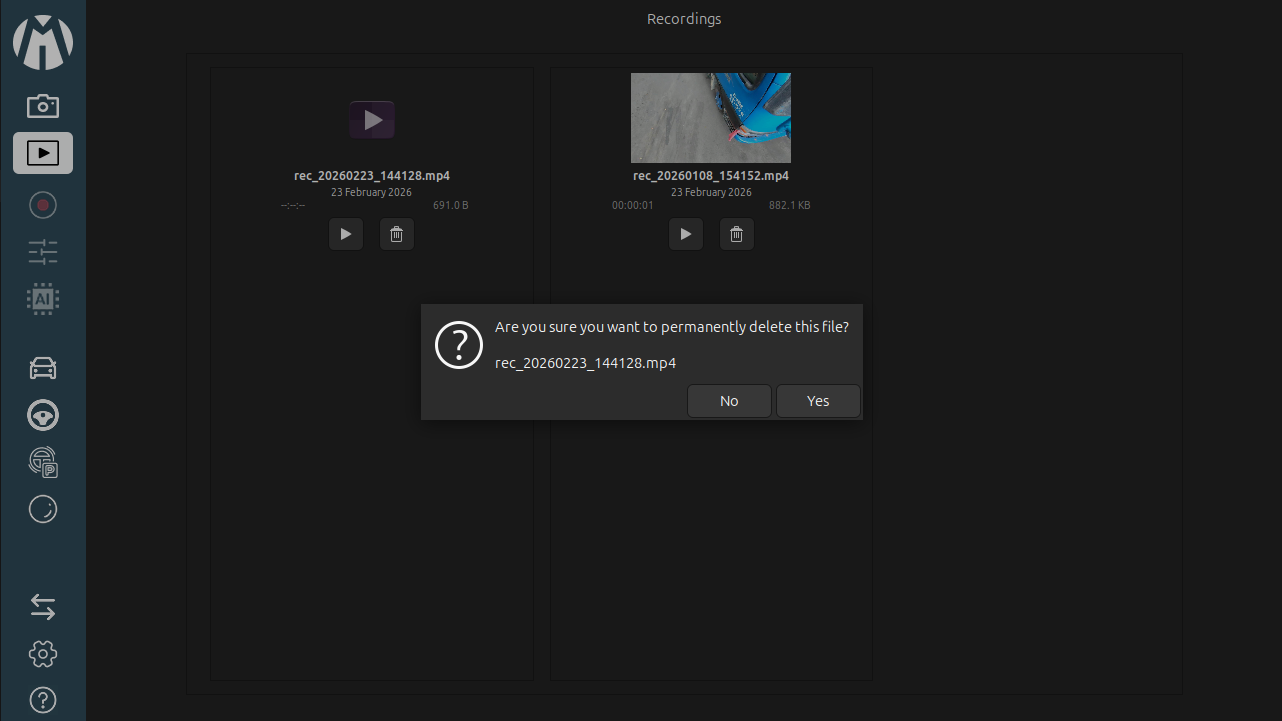
Playback Mode allows users to review, analyze, and manage recorded footage captured during live monitoring sessions. This mode is designed to provide an easy way to replay past recordings, verify events, and extract visual information for evaluation or reporting purposes. This section shows all saved video recordings, including file names, timestamps, and duration. Each file can be selected for playback, and users can delete unnecessary recordings directly through this interface for better storage management.
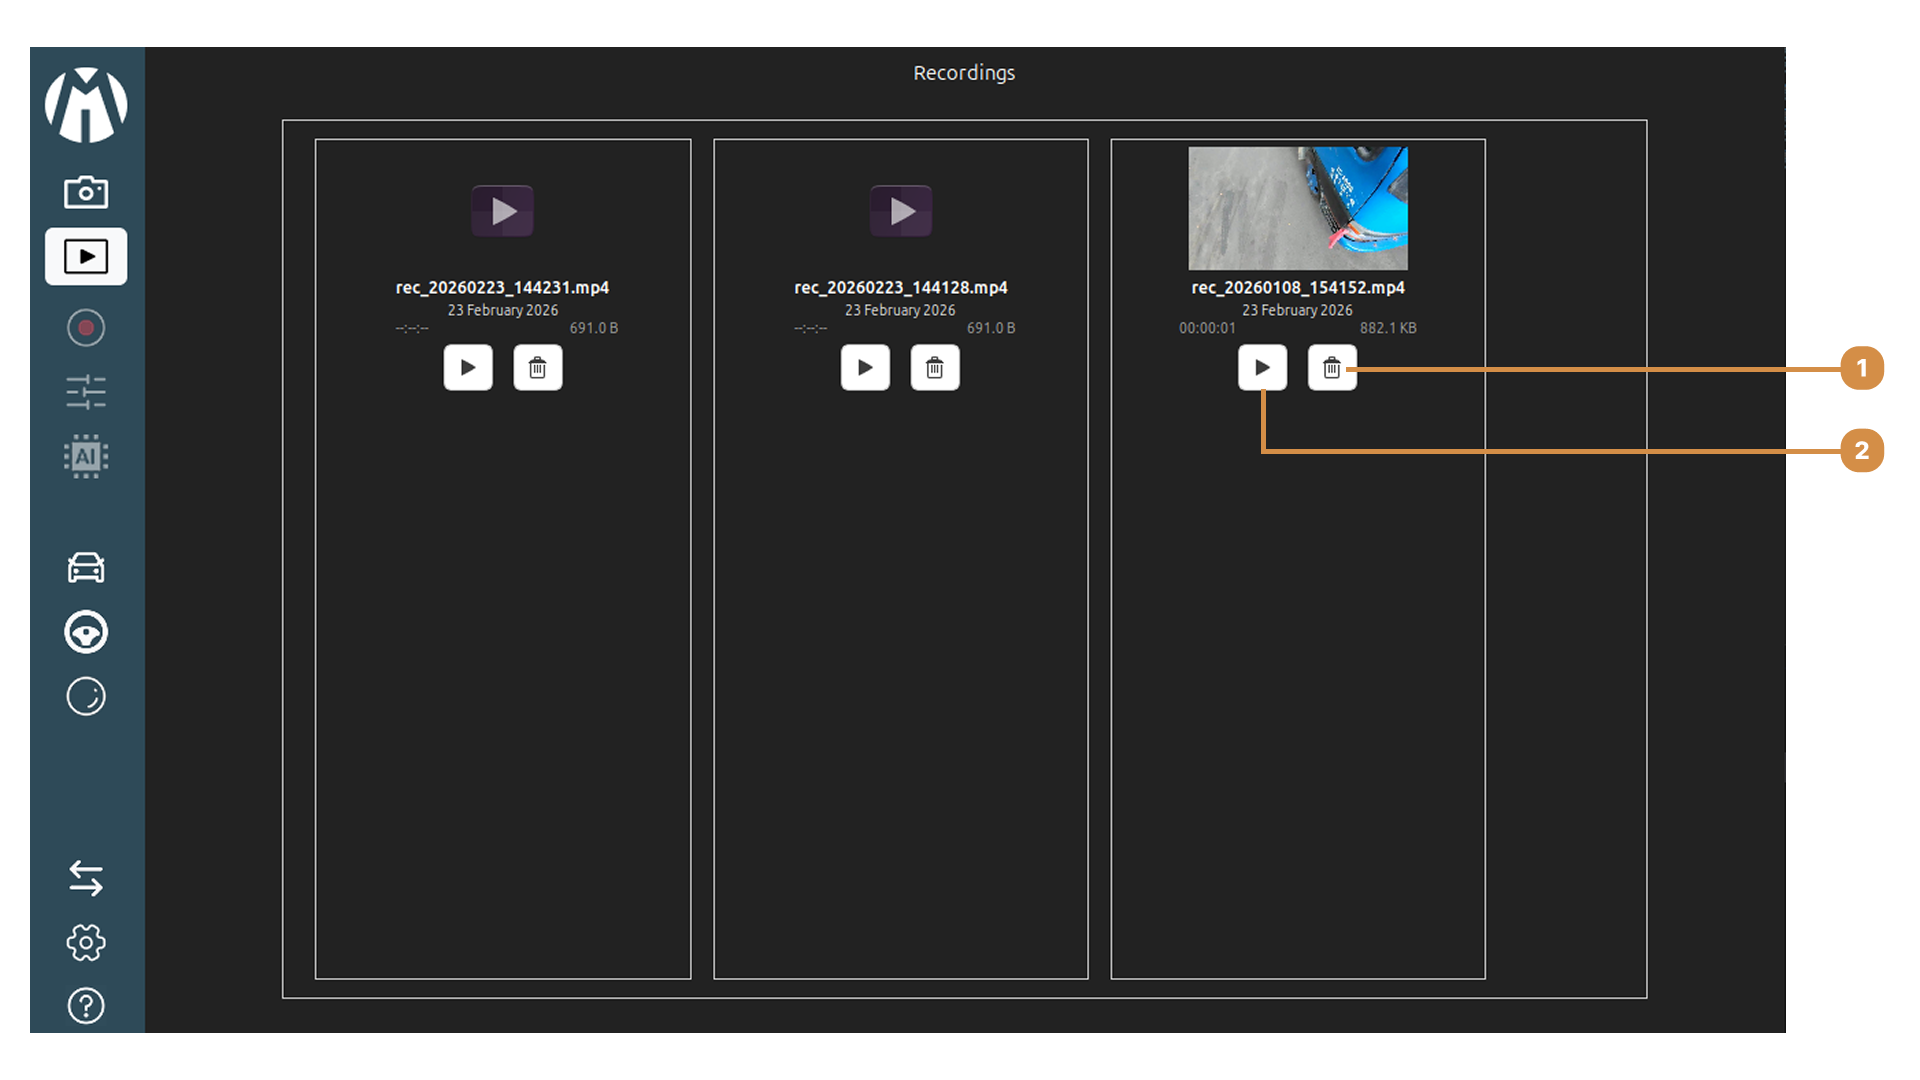
When entering Playback Mode, the interface displays two main sections:
1. Delete Video
This section allows user to delete recorded video. After clicked button delete, confirmed deleting masage.
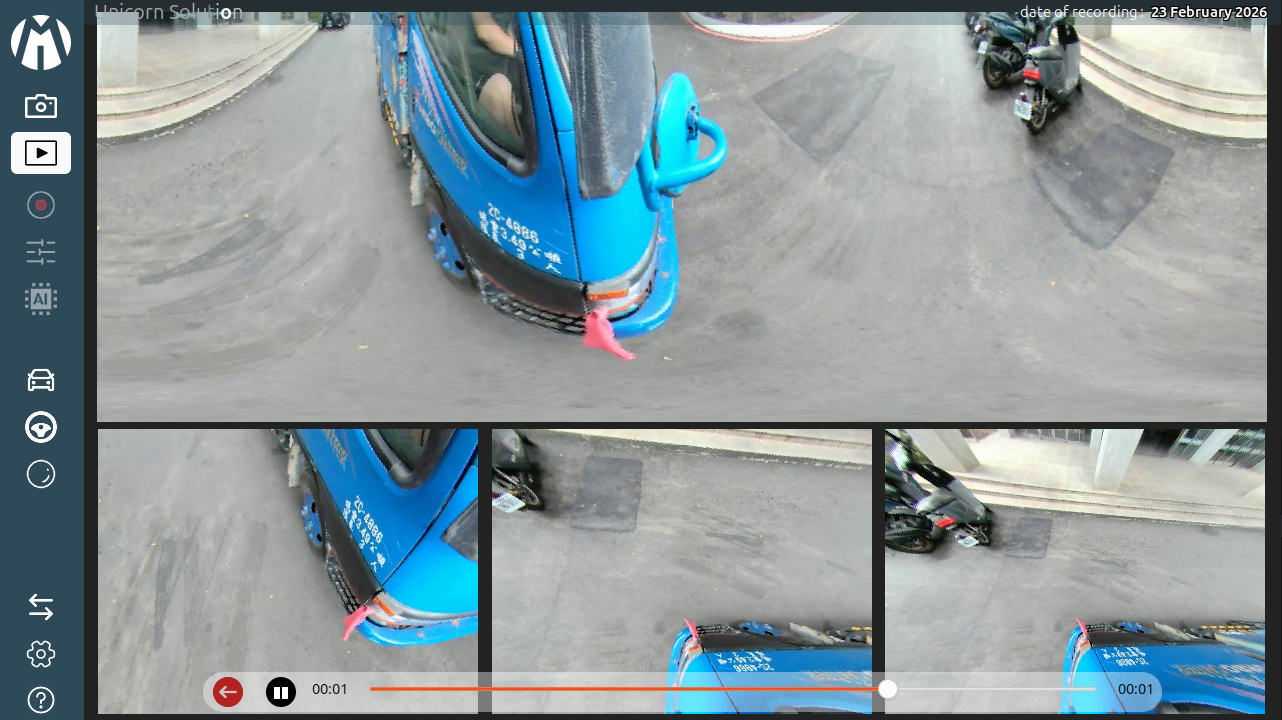
2. Play Recorded
Once a recording is selected, users can play, pause, and navigate through the video timeline using the control bar. This visualization helps in reviewing incidents, checking blind spot coverage, and confirming system accuracy.
Configuration Mode
Configuration Mode is used to adjust camera parameters and visual settings to ensure that each camera feed is correctly aligned and displayed according to system requirements. This mode allows users to fine-tune the field of view, angle, and zoom level of each camera to achieve accurate fisheye image correction and seamless multi-camera integration.
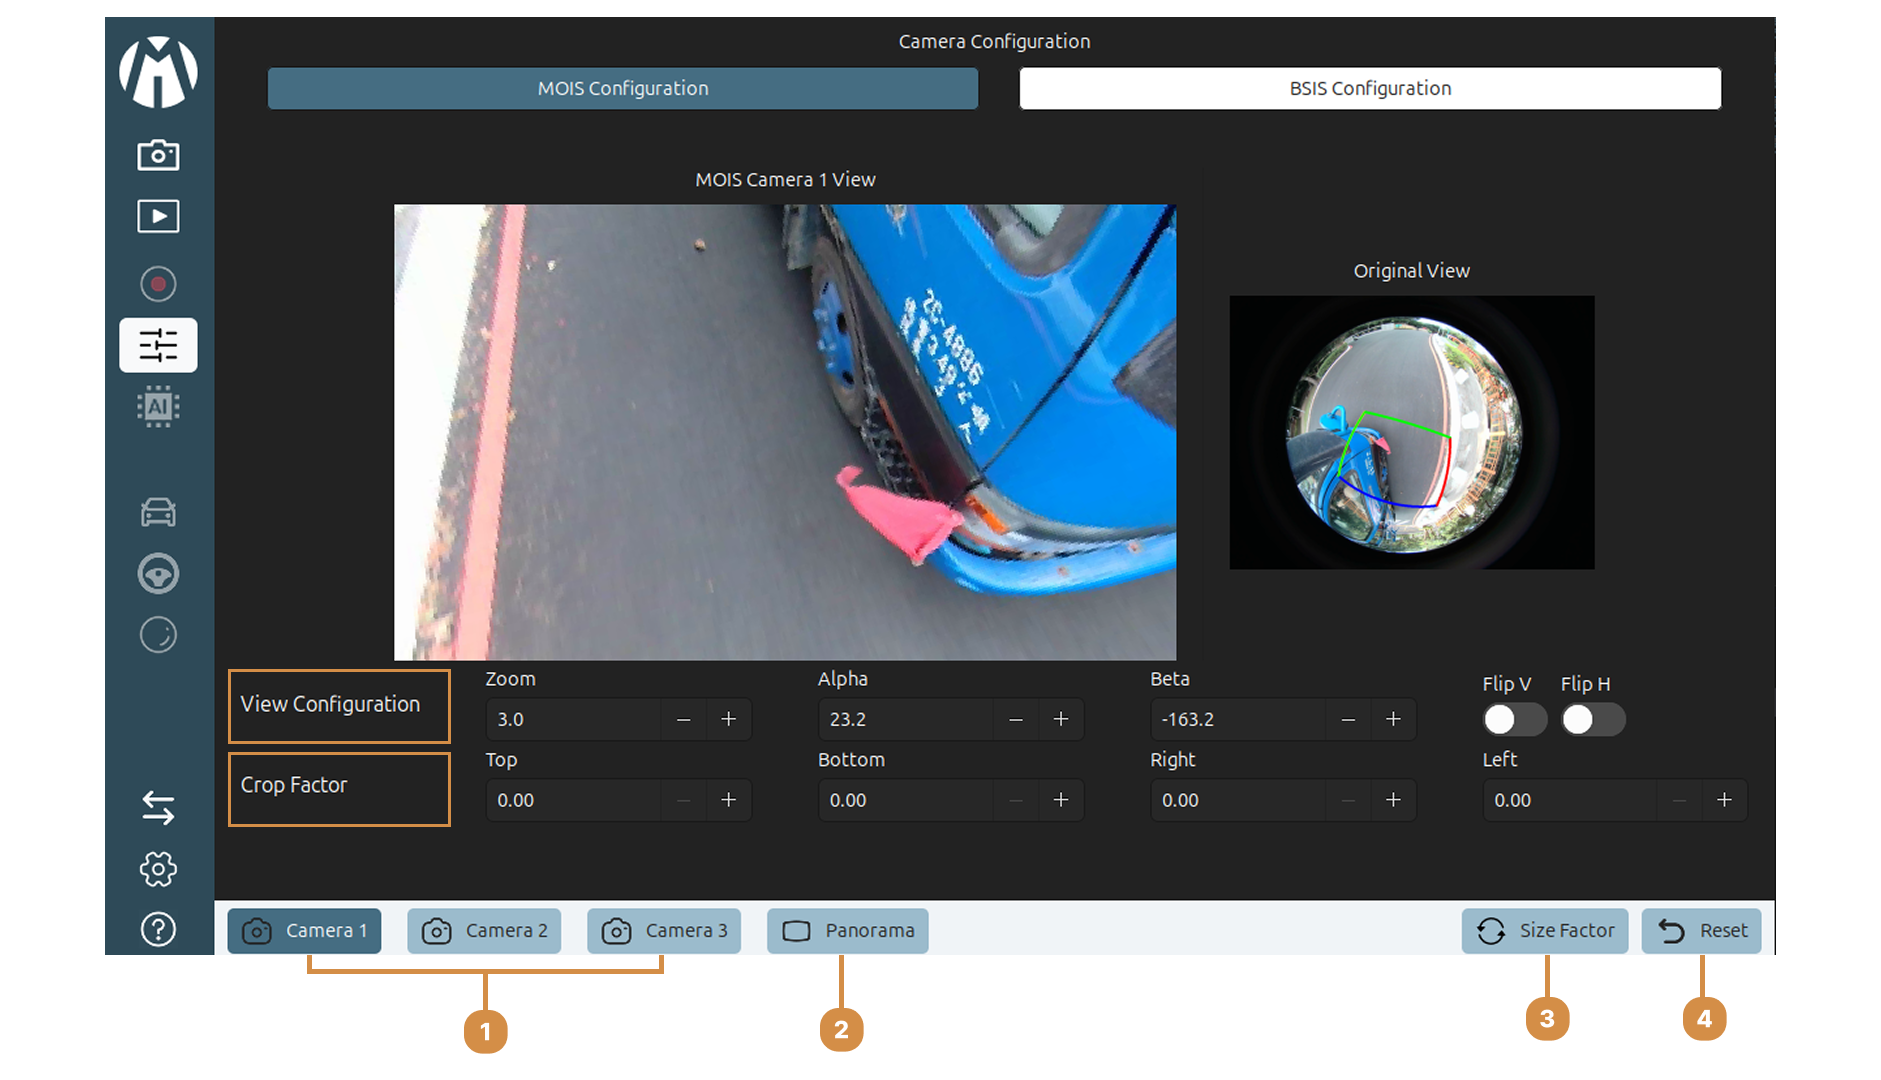
The interface consists of several adjustable controls and camera selection options.
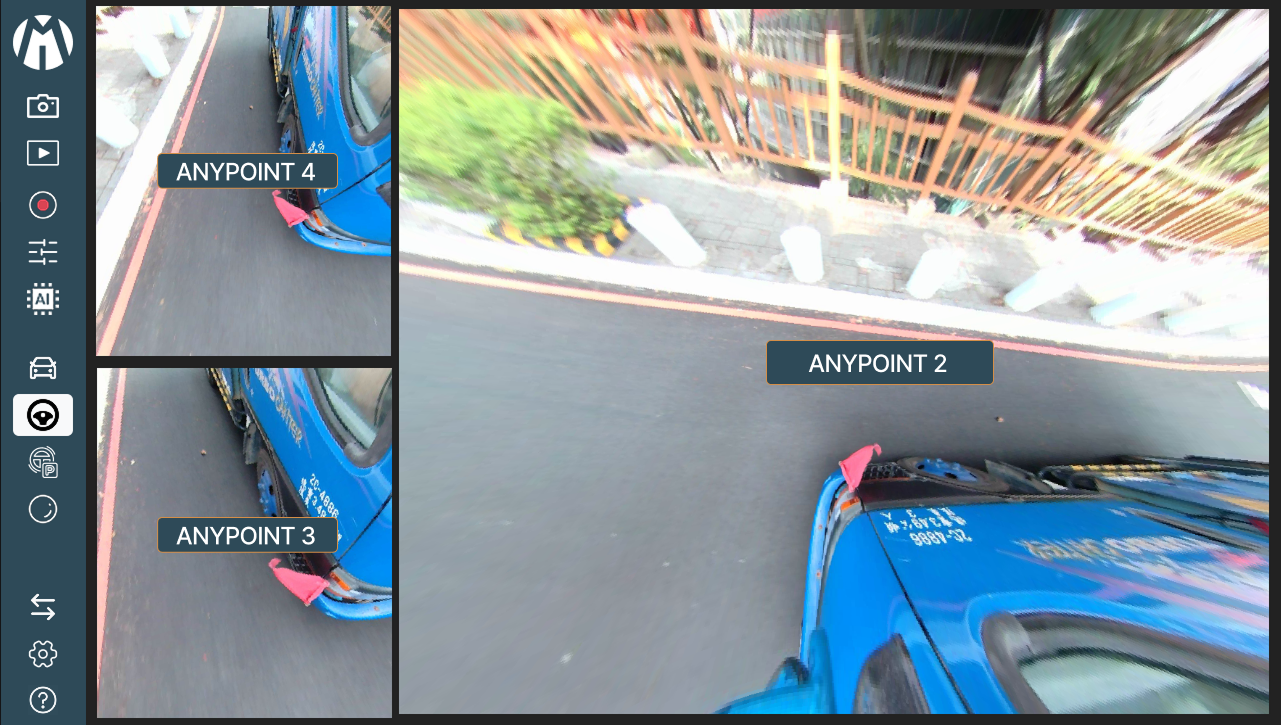
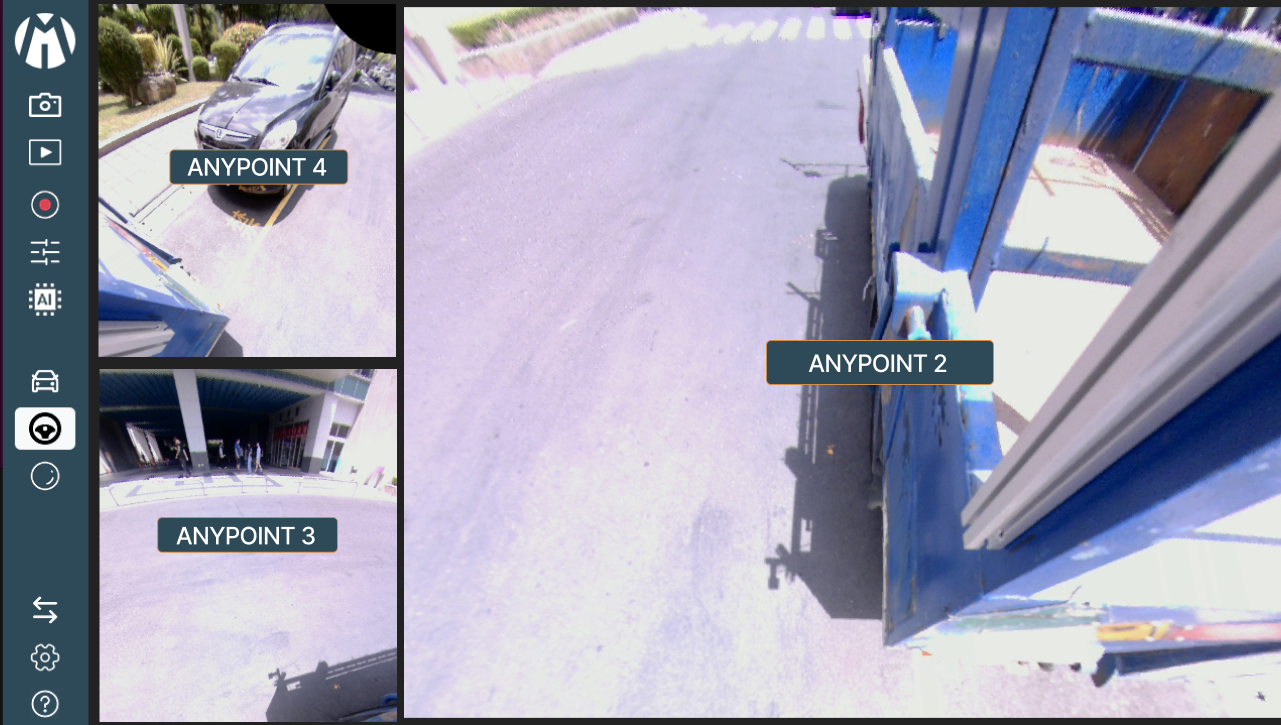
Note: The red-boxed View Configuration panel appears by default in every Camera View. You configure one camera at a time, and a single camera can be split into multiple Anypoint views.
- Camera Selection (Cam 1 – Cam 4) – These buttons allow users to select which camera feed to configure. Each camera can be individually adjusted to match its mounting position and viewing direction on the vehicle.
- Panorama View – Switches the display to the panoramic stitching preview, allowing users to check how multiple fisheye cameras combine into a single, wide-angle panoramic image.
- Size Factor – Adjusts the scaling ratio of the dewarped image, ensuring that all cameras maintain consistent proportions in the combined display.
- Reset – Restores all configuration parameters (zoom, angle, crop, and scale) to their default values for the selected camera.
- View Configuration – The main panel for tuning the active camera view. It includes:
- Zoom for magnification control.
- Alpha to adjust vertical tilt (up/down).
- Beta to adjust horizontal tilt (left/right).
- Flip V / Flip H to correct image orientation based on the physical camera installation. Use this panel to align and orient the image before cropping or stitching.
- Crop Factor Configuration (Top, Bottom, Left, Right) – Defines the visible portion of the fisheye image by trimming edges. Adjust Top, Bottom, Left, and Right to remove unwanted areas and to optimize overlap between cameras for a clean panoramic stitch.
AI Mode
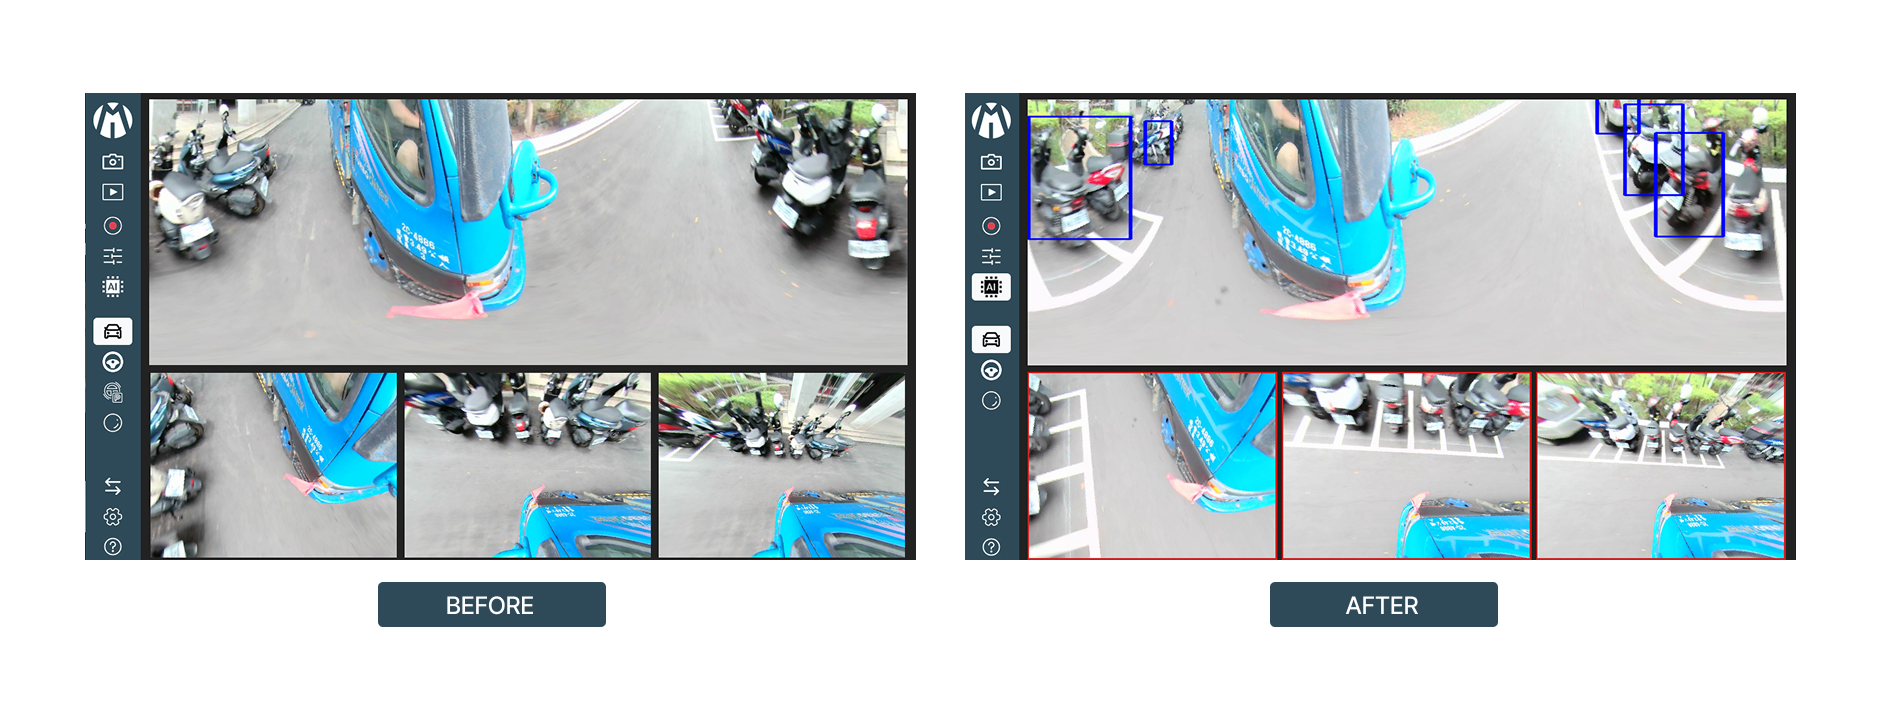
When AI Mode is enabled (indicated by the highlighted AI Circuit Icon on the sidebar), the system executes the following functions:
1. Object Identification (Bounding Boxes)
The system automatically renders blue Bounding Boxes around detected objects. This visual aid helps operators focus on critical moving elements within the vehicle's blind spots.
2. Multi-View Synchronization
The AI detection engine works simultaneously across all display panels:
- Panorama View: Provides the broad context of detection within a wide field of view.
- Focus Panels: The bottom panels (Left, Center, Right) highlight objects as they enter specific detection zones to assist in distance estimation.
3. Real-time Analysis
The algorithm processes video frames with ultra-low latency, ensuring that the detection boxes accurately track the real-world position of moving entities.
Switch Mode
The Switch Mode function serves as the primary control for toggling the operational state of the Unicorn Solution application. It allows users to transition the system between passive readiness and active environmental monitoring. The application operates in two distinct states:
1. Standby Mode
- Status: Monitoring Off / On.
- Description: In this mode, the system remains in a low-power. It is used when active detection is not required, such as when the vehicle is parked or during maintenance. The interface displays a "Welcome" screen visualizations of the camera's theoretical coverage zones.
2. Drive Mode
- Status: Active Monitoring.
- Description: Once engaged, the system initiates real-time data processing. The live camera feeds (Fisheye inputs) are activated, and the AI engine begins detecting objects within the designated safety zones (MOIS, BSIS, and REIS).
Help Mode
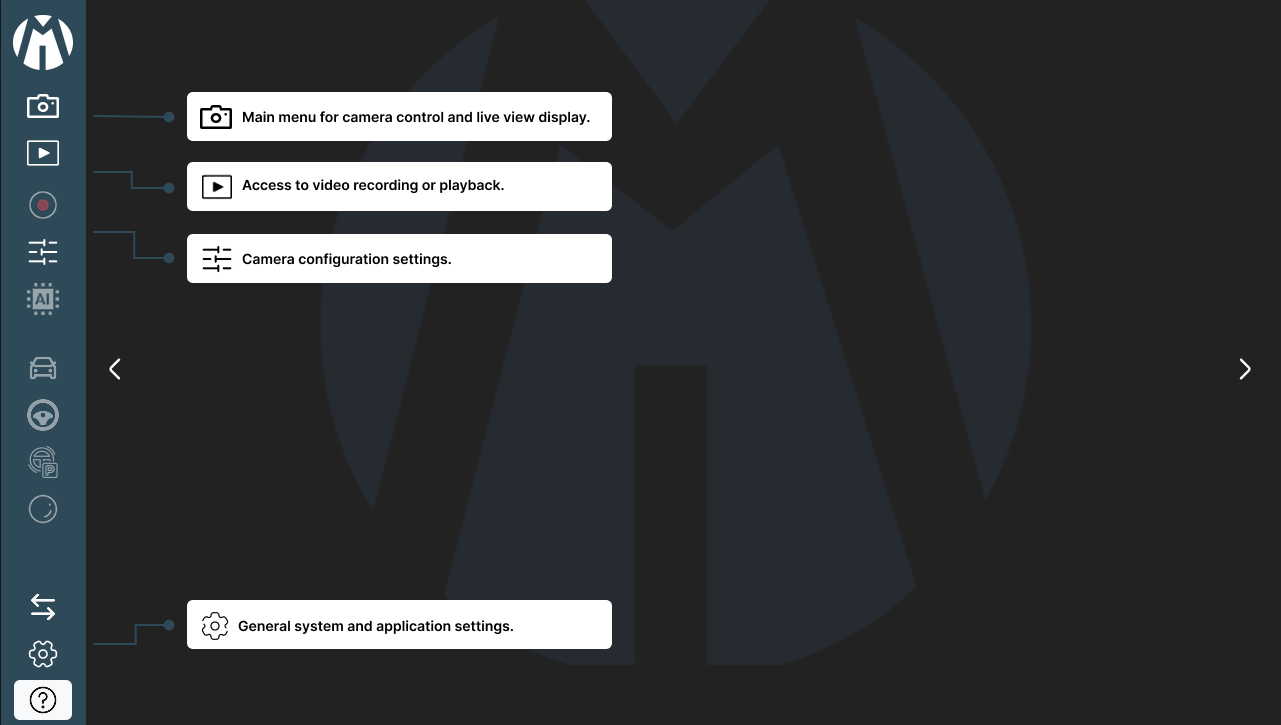
Help Mode provides an on-screen guide that explains the function of every button and control within the Unicorn Solution interface. It is designed to help new users quickly understand how to operate the system without referring to external manuals. When Help Mode is activated, labels and tooltips appear directly on the interface, describing the purpose of each icon and button in both the Sidebar and the Live View Control Bar.
Settings Mode
Settings Mode allows users to customize various system preferences and operational parameters to suit different environments and user needs. This menu provides quick access to five main configuration categories — Camera Parameter Settings, Resolution Settings, Date & Time Settings, Language Settings, and About. Each of these settings ensures that the Unicorn Solution application operates accurately, efficiently, and according to user or system requirements.
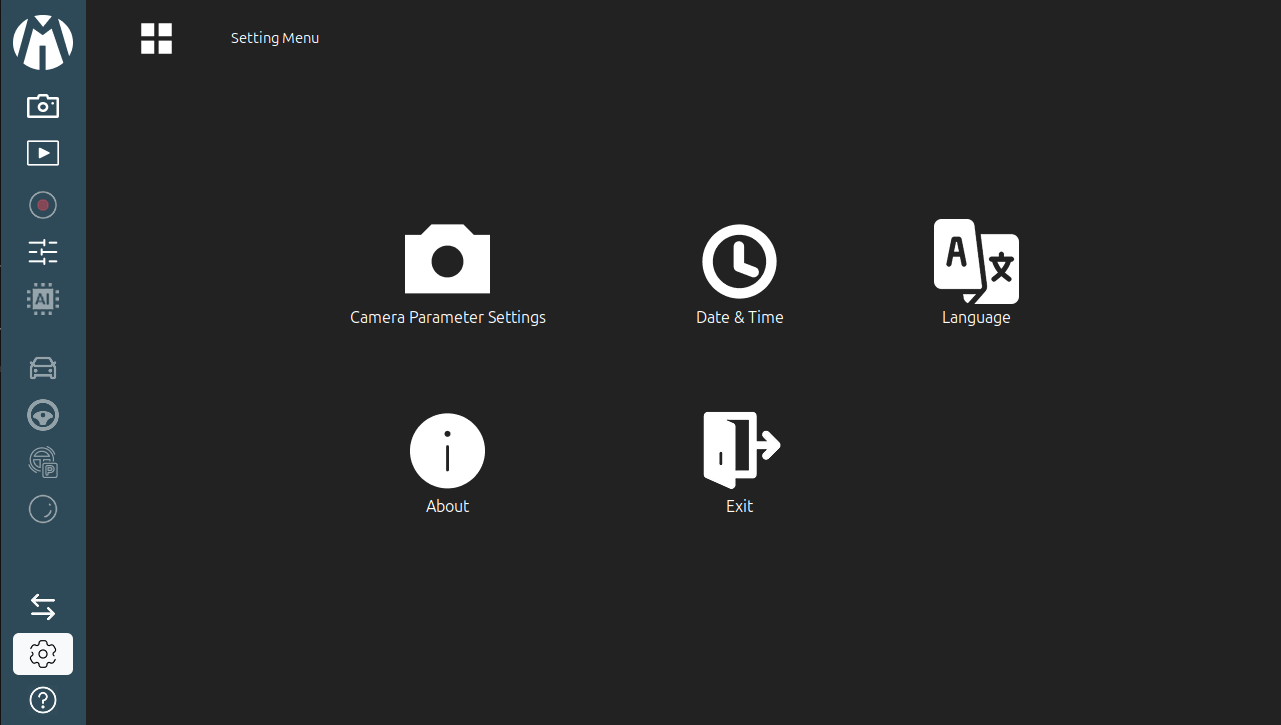
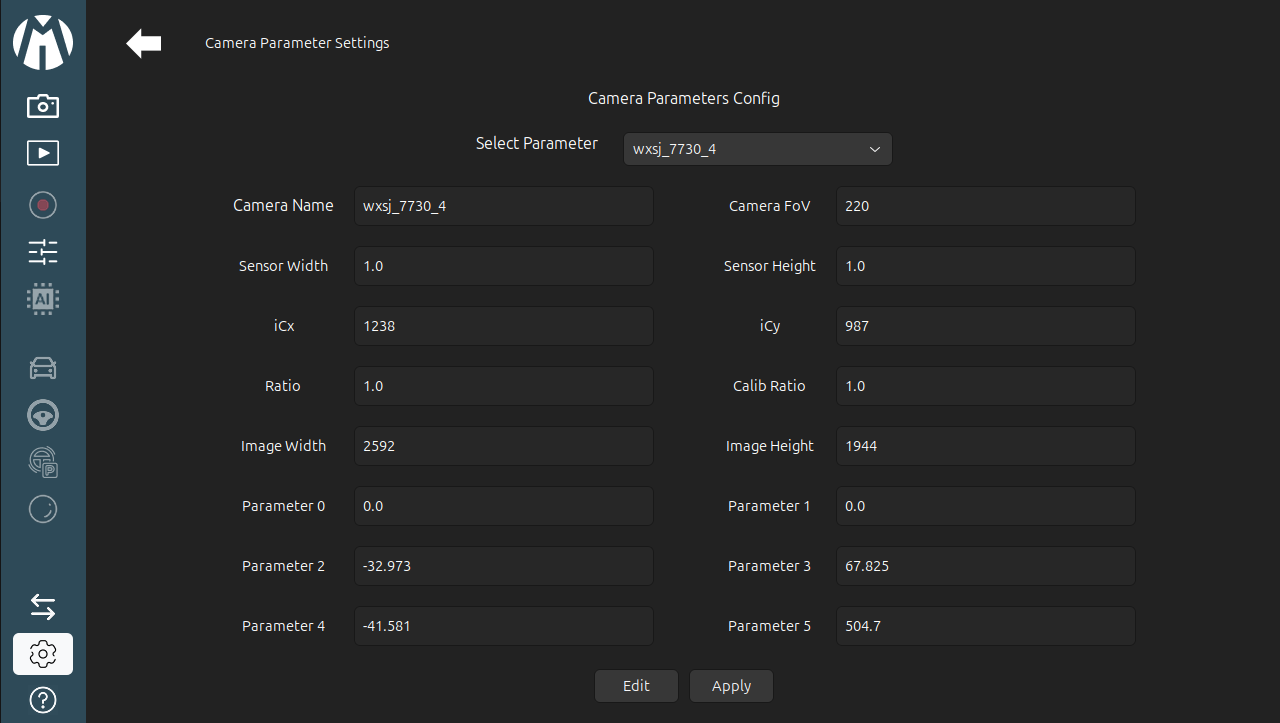
1. Camera Parameter Settings
Used to load or adjust the camera’s calibration data and configuration parameters. This ensures that the fisheye image projection, alignment, and dewarping process display correctly in each view mode.
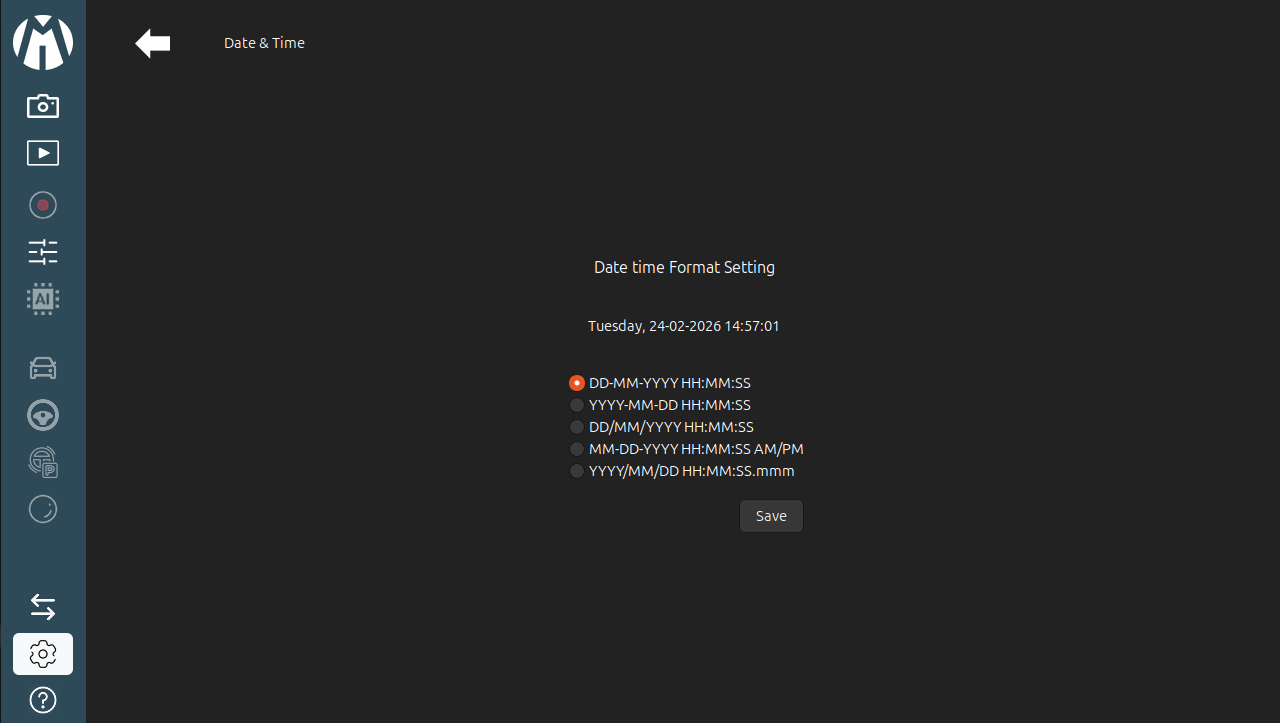
2. Date Time Settings
Enables users to set or synchronize the system’s internal clock. Accurate date and time are crucial for timestamping recorded footage and event tracking in both Live View and Playback modes.
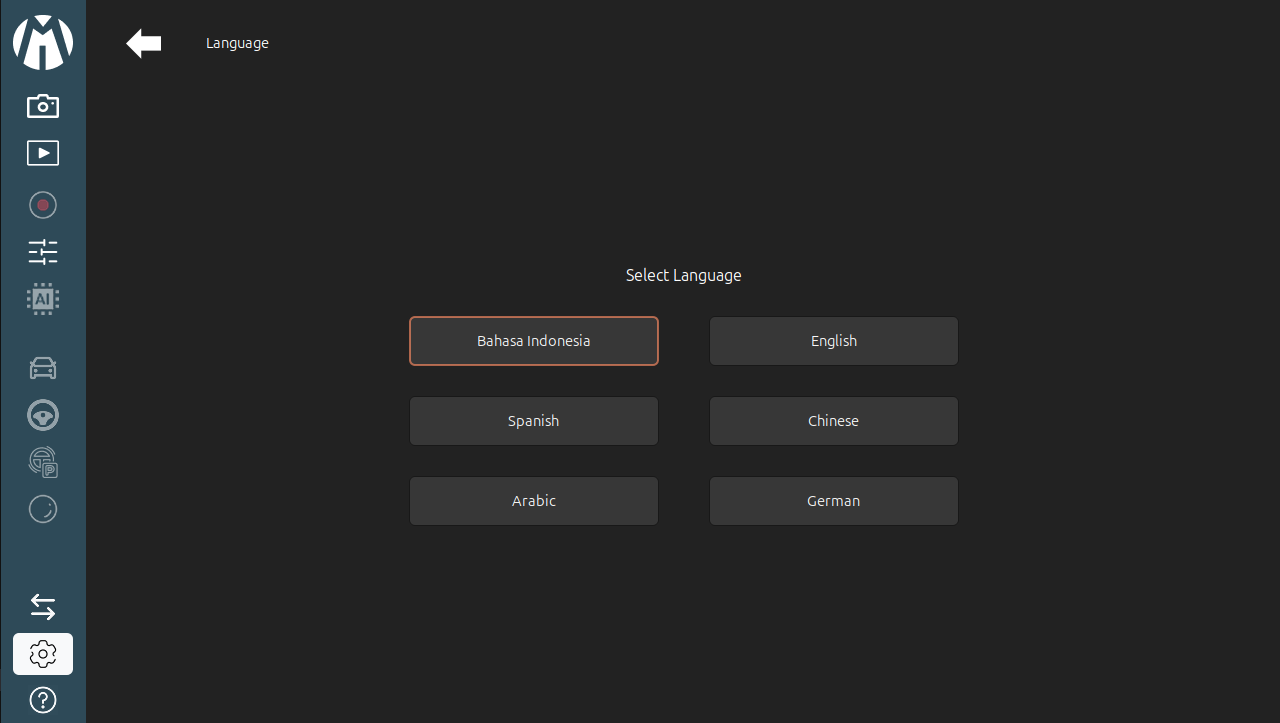
3. Language Settings
Provides options to change the interface language, allowing for localization and easier use in different regions or by various operators.
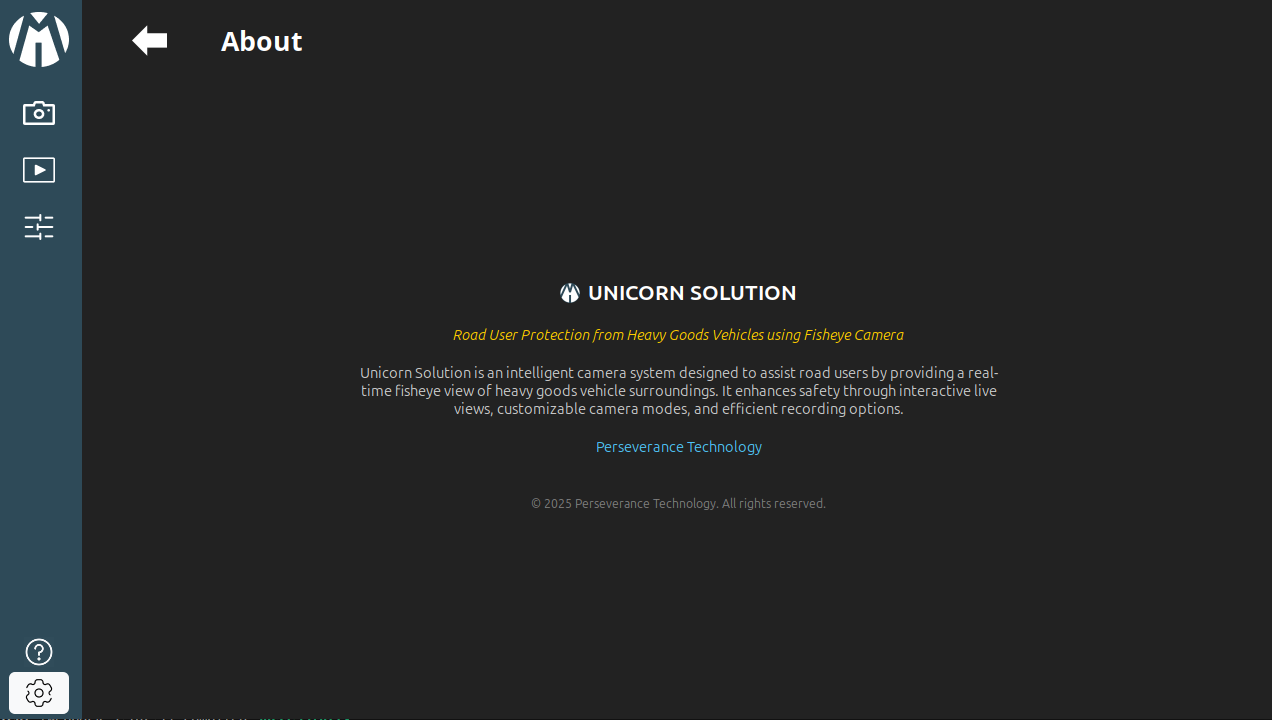
4. About
Displays information about the Unicorn Solution software, including version number, license details, and developer or support contact information.
By following these steps, users can easily operate the Unicorn Solution system—from live monitoring to playback and configuration—ensuring efficient and safe visualization for vehicle camera operations.